| November
4,
2005
DEconstruction
begins!
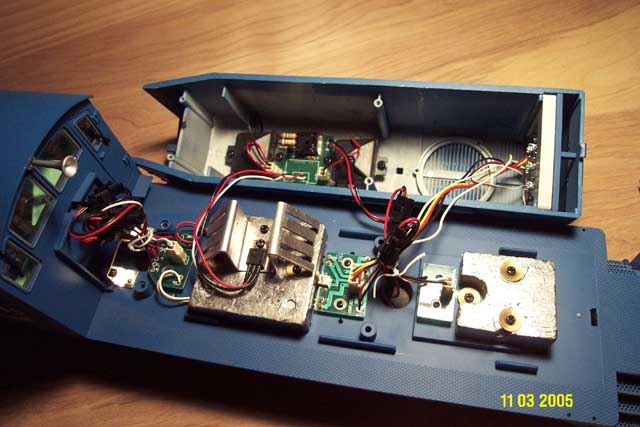
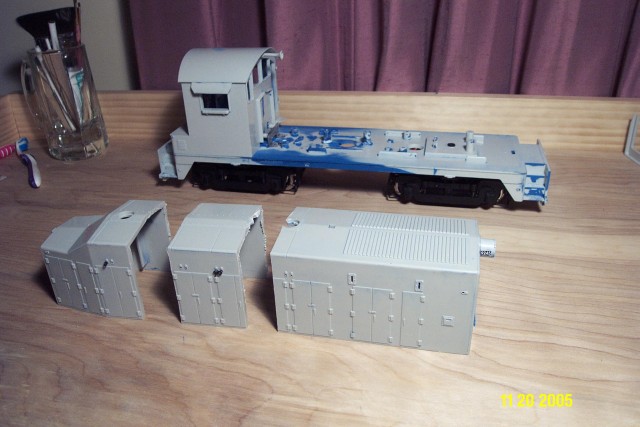
I
removed every
bit of
wiring, circuit boards and metal from all the blue
bits of plastic, so
that the paint can be stripped.
USA
trains did
a nice
job of making this engine easy to disassemble!
the
major bits of
wiring
are connected with clips, so they can be simply
unhooked.
there
are 6 sets
of black
clips..to remember which is which when I
reassemble, I scraped numbers
into both sides with an x-acto blade.
1-1 on
both sides
of
the first clip
2-2 on
both sides
of
the 2nd clip.
etc.
through
6-6.
I also
scraped
the trucks,
with a "F" for front truck, and an arrow pointing
to the front of the
engine.
and a
"R" for
rear truck,
and also an arrow pointing to the front.
I took
these
photos mostly
as an aid to put this thing back together! [:D]
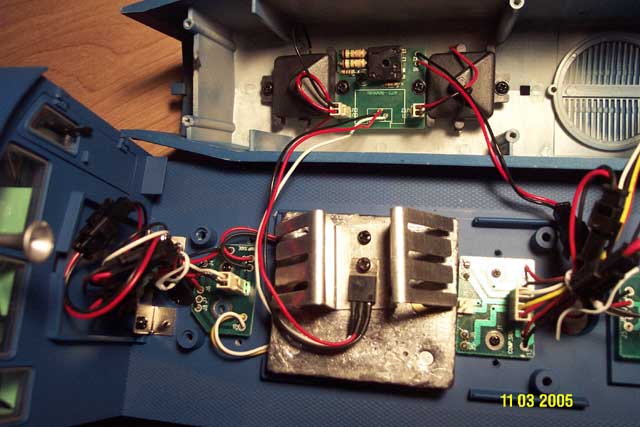
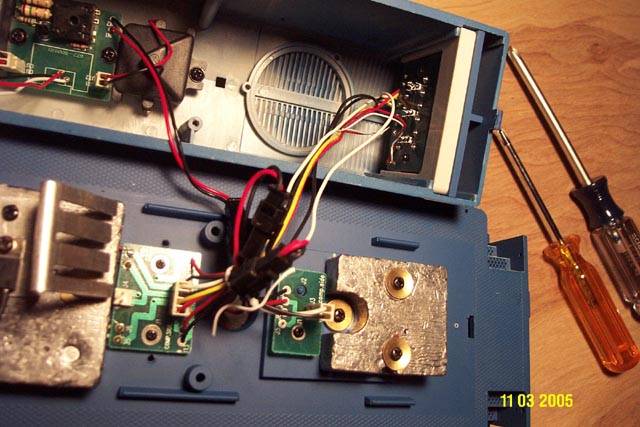
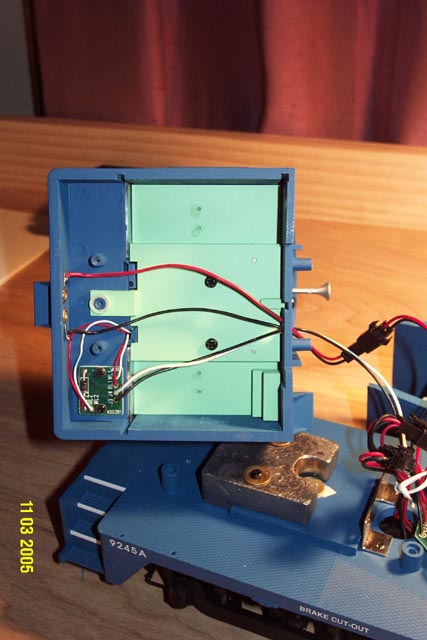
The
only wires
I snipped
are these 4 wires running into the cab.
the
clips might
have
fit throught the hole, but I started to pull the
cab interior out too
soon,
blocking the hole, then the cab interior didnt
want to shove back
up..so
I just snipped the wires.
not a
big deal, I
can
just splice them back together.
(I have
several more detail
shots of the wiring..I wont bother to post them
all. if anyone wants to
see them just drop me a line.)
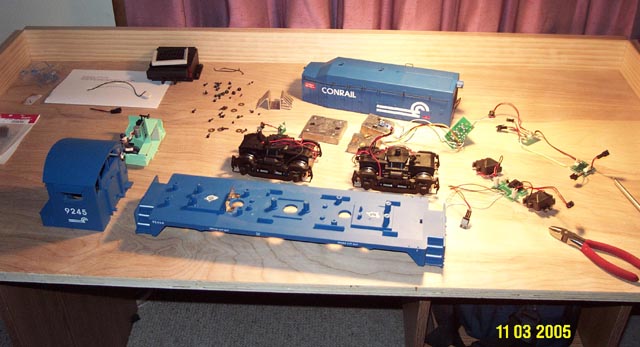
woo!
all
apart!
3 large
bits
of blue plastic
34
screws
4 bits
of random
circuitry.
2 trucks
window
plastic
removed.
some
lead
weights, cab
interior, and a few other random bits.

a few
of the
round handrail
eyelet things didnt want to come out, and the
handrail actually pulled
*through* them, leaving the eyelet behind with a
crack in it.
shouldnt
be a big
deal.
thats
everything so far!
next
up..strip
the paint!!
November
19,
2005
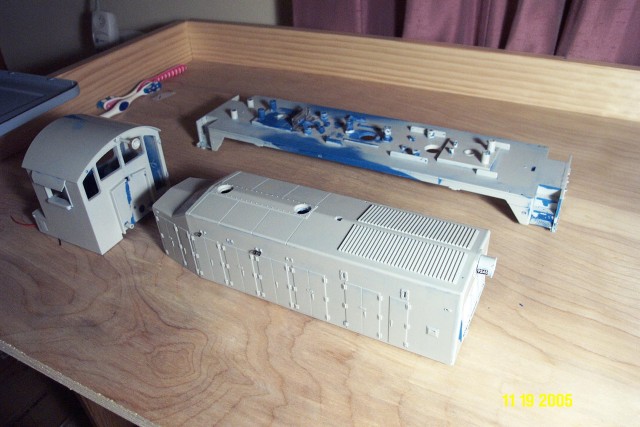
paint
is
stripped!! 
well, as
good as
its
going to get anyway..
the bits
that are
still
blue remain that way because the container for the
alcohol wasnt quite
long enough for the entire frame to sit
submerged..I could only soak
one
end at a time, and the middle couldnt get
soaked..its good enough!
its
going to get
a coat
of grey primer anyway before the color coats..I
dont think the
remaining
blue will "show" in the finished model..
November
20,
2005
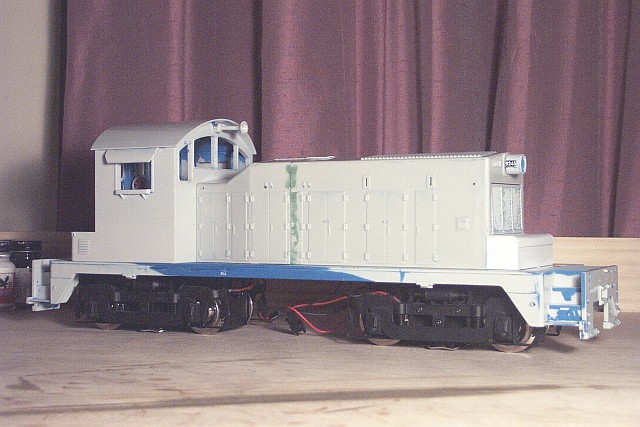
Cut!
the
pieces fit
properly..
but I
cant put it
on
the frame yet..because there are now tabs and
posts on the frame that
are
in the way of the shortened shell..
have to
dig out
my files
and other saws to do that job..
I looked
for them
tonight,
(still packed away somewhere..from moving 2 months
ago)
fitting
the shell
to
the frame must wait for another day..
December
6,
2005
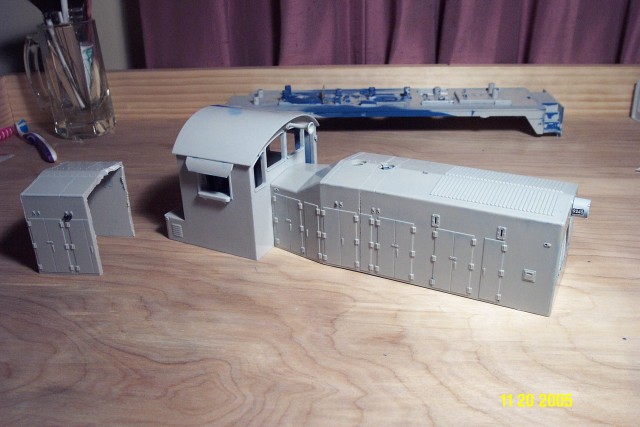
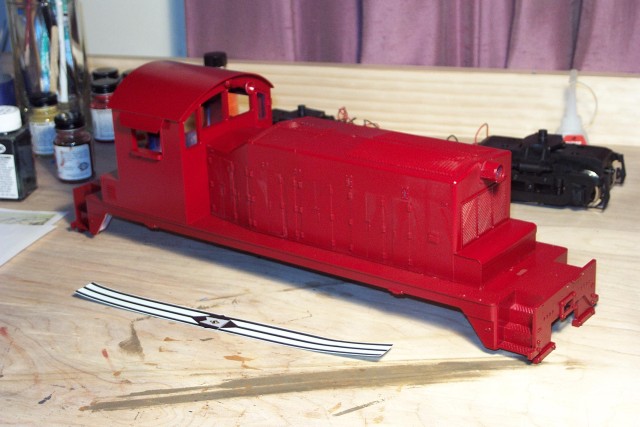
the
shell is
together!
squadron putty applied and sanded.
new tool
box for
the
front scratchbuilt out of styrene.
(im
assuming
thats a
tool box, but im not really sure..havent had the
opportunity to peek
inside
one.)
next,
primer
and paint!
I
started putting
the
decals together in photoshop today, I will get the
order sent out to
Stan soon!
December
12, 2005
Designing
decals..
no
decals exist
for 1/29
scale LV diesels, so I have to make my own!
Thanks
to Ray over on
the LVRR forum, I got accurate prototype
details for the stripes!
see
this
thread for the discussion on stripes.
next,
send the decal order
to Stan have them printed, spray on some
primer, and test a few reds.
I
have one Krylon
red
that I think is a good match, but I still
need to experiment to find
that
elusive perfect LV Cornell Red.
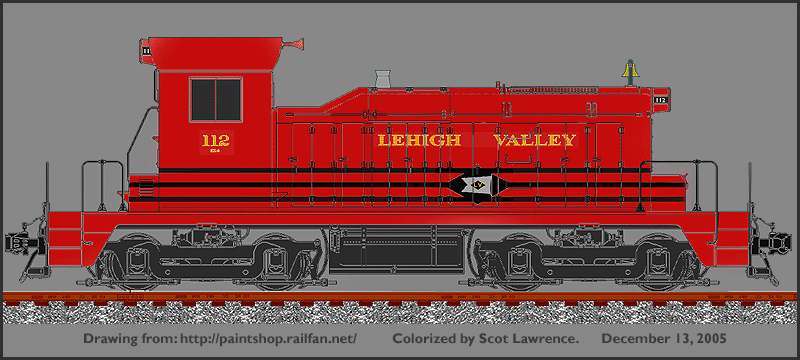
I
re-did the decal sheet,
enlarged the drawing of the SW1 to full-size
for 1/29 scale, then cut
and
pasted my decals onto the drawing with
photoshop, without re-sizing
them
at all.. here is the result:
and
here is my final decal
sheet! :P
8.5
X 11 inches.
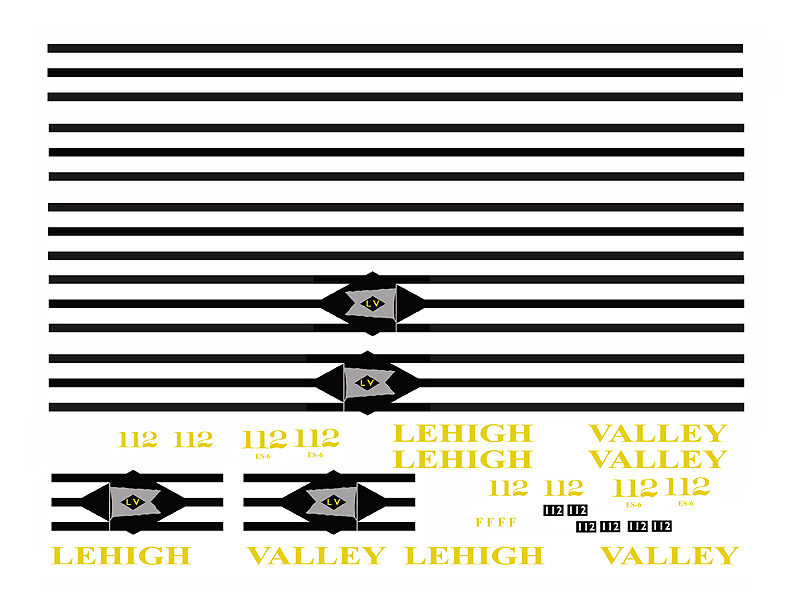
thats a
reduced-resolution
version for posting on-line..
its
only 72
dpi..(or
technically, "ppi")
the
real version
is 300
ppi and will be printed on an alps printer.
time
to send the
decal
sheet to Stan
for printing!
December
19, 2005
we have
RED!!!
Lehigh
Valley "Cornell
Red" is a very controversial color..
every
LV fan has
their
own opinion on what it should look like.
I
believe I know
whats
its supposed to look like ;)
its
a true, deep
dark
red.
not
a hint of
purple
in it, its not maroon, its not burgandy..no
hints of reddish
brown..just
pure 100% RED!
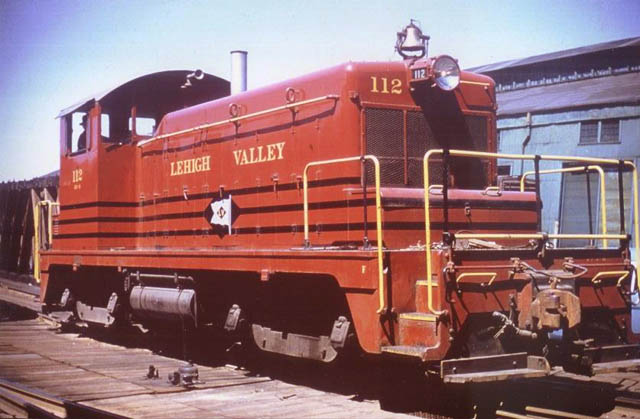
(the
photo of the
real
112 above is too "orangy"..bad color
reproduction..perhaps a fading
slide.)
its
a tricky
color! ;)
after
trying out a few
flavors of Krylon reds, I found a great
one!
December
22, 2005
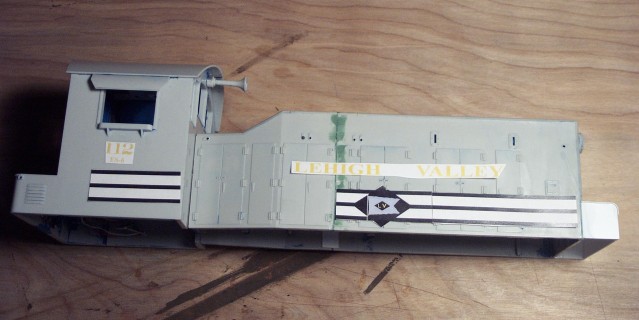
Decaling
begins...
the
next update
will
probably be of the finished engine!
I
expect to
finish the
week between Christmas & New Years..
Merry
Christmas!
Scot
On
to page 4, Finished! 
|