Page 4.
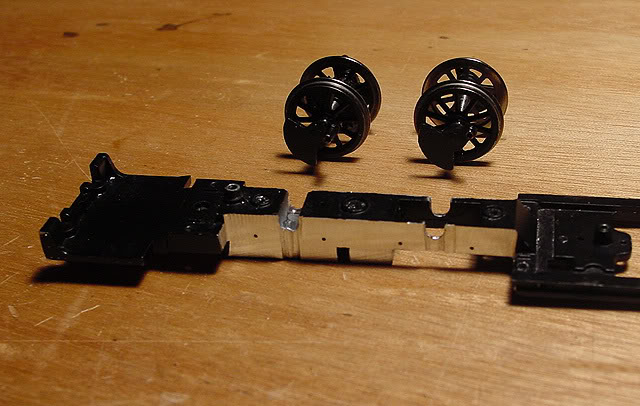
Frame is regauged! 
March 27, 2008.
I considered attempting
to regauge the drivers myself, but decided a smarter move would be to send
the drivers out to John Rogers of Rogers
Model Locomotive Works.
John built the
first
reported On2 forney conversion in October, 2007 and wrote about it
on the On2 forum.
John is now offering
a regauging service, for the drivers alone or the whole frame.
I was confidant
I could deal with the frame, so I mailed off the drivers to John and got
them back
in a few weeks...they
look great, thanks John!
I have actually
had the drivers back for awhile, but put off working on the frame while
I worked on the new cab instead...finally it was time to get to work on
narrowing down the frame..
As has been mentioned
before, the frame needs to be narrowed 3-4 mm so that the regauged drivers
will fit.
I ground the
frame down with the "brute force" method! 
its not elegant,
but it gets the job done.
I bought a dremel
attachment, the Dremel
231 Shaper/Router Table, I was thinking I could use a grinding bit
in the dremel, use the fence to guide the frame, and neatly grind away
bits of the frame..
well..the fence
didnt really work, (because of the frame shape) so I ended up just hand-holding
the frame
against the bit...I
probably could have done this without the shaper/router table, but it was
inexpensive
(30-some dollars
at amazon.com) and I will be able to use it for other projects..so even
though it wasnt terribly useful for this particular project, it should
still be handy to have...one can never have too many tools!
I started with
the table, and just ground away at both sides of the frame:
(dont forget
your safety glasses!)


It worked well
for the largest removal of metal..
then I did some
finer work with a hand file.
(I went out an
bought a brand-new file at Home Depot..one specifically designed for metal..
wow! what a difference!
apparently all my other ancient files were for wood..never gave files much
serious thought
before now! )
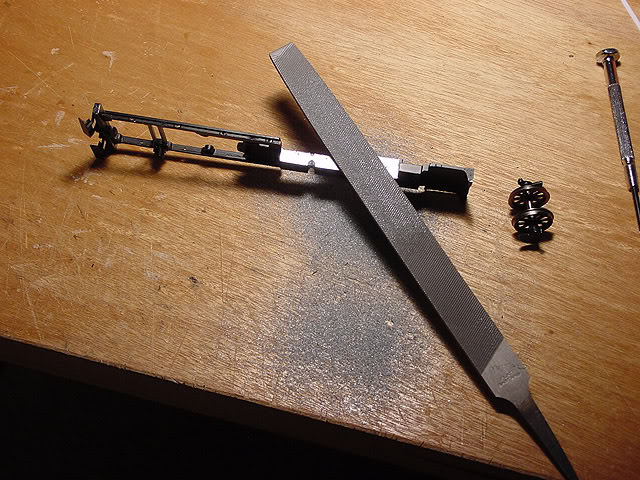
Your can see that
I also filed "grooves" deeper into the frame right at the axle cutouts.
this is because
the frame needs to be even narrower right at the axels, because
of the
plastic insulation
where the driver meets the axle..rather than make the whole frame narrower,
I thought it
would be better to make the frame the narrowest only right where it's necessary.
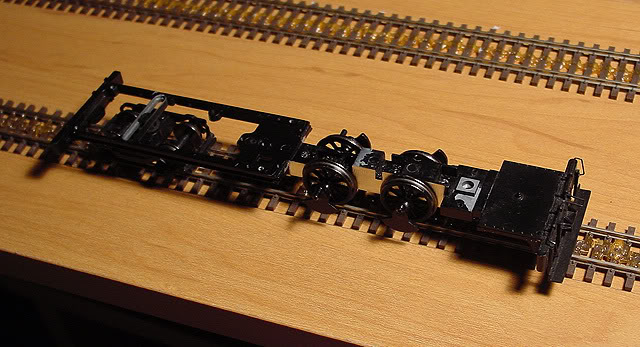
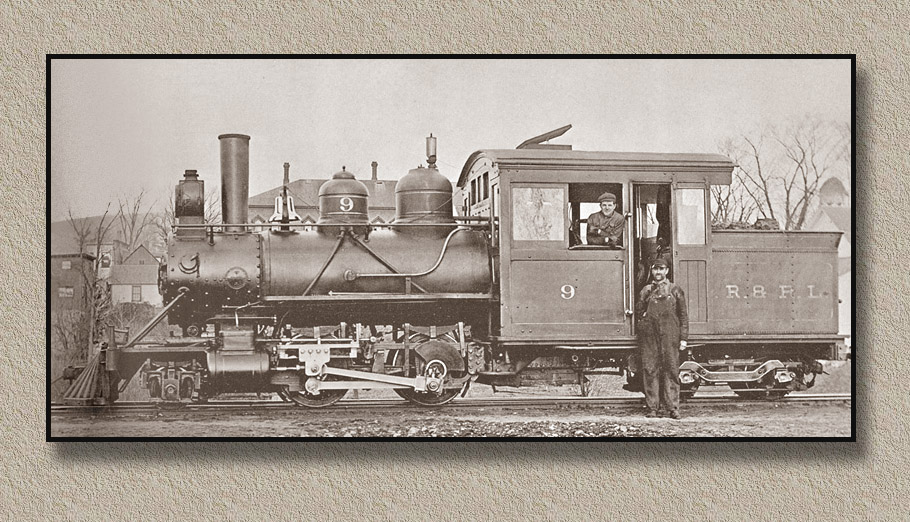
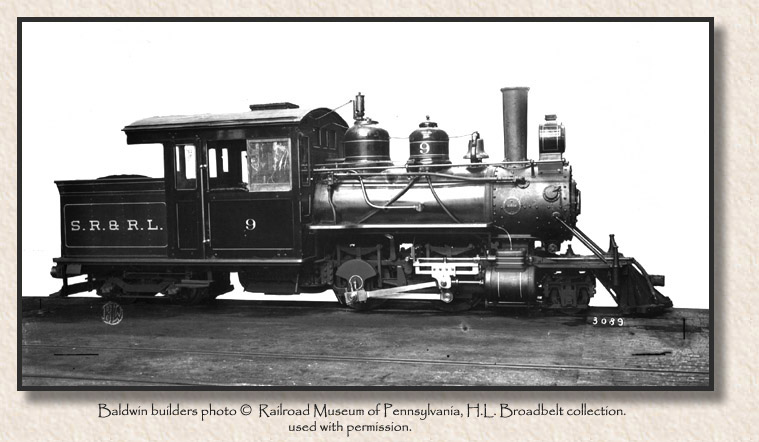
March 26, 2008
- Drivers are on!
and the locomotive sits on On2 rails for the first time!

A test-fit with
the new cab..
I also narrowed
the axels for the tender truck, which was very easy...
just pull the
wheels out of the center plastic axle, cut 4mm off of this axle,
slide the wheels
down their metal axles, re-insert the wheels in the plastic..and done!
I havent narrowed
the pilot truck yet..that will require some more grinding and cutting of
metal.
Now I have a decision
to make concerning the area where the driver axels meet the frame.
as predicted,
narrowing the frame completely removed the original axle bushings..they
no longer exist.
the drivers are
now sitting in the "deeper" cutouts, which arent intended to be actual
axle bearings.
..should I make
and install new brass shims or not?
the wheels actually
roll pretty well without them! but the driver axels also have a more wobbly
fit than
before, which
brass shims would fix.
One benefit of
not adding new brass shims is that the model sat slightly too high before,
(too high for
SR&RL #9 anyway)
and now its slightly
lower...not a major issue really, but it is something on the "plus side"..
on the "minus
side" of not adding shims is the question..will the drivers be too loose?
is there too
much slop for quality running?
I dont know yet..
I will have to
re-assemble everything and actually power-up the loco to see how it runs.
Thats the next
step..some re-assembly..(but not total re-assembly yet)
I will have to
put all the wiring back together, devise a method for attaching the cab
to the loco,
then try to power-up!
see how she runs.
after that will
be some work to the boiler, filing off the boiler bands, making a new boiler
jacket,
and I will probably
have to scratchbuild a pilot..
still lots to
be done!
Update!
April 23, 2008
Well its been
almost a month since the last update above..
and there has
been absolutely ZERO work done on the forney in that time!
This happens to
me once in awhile..I can only work on model railroad projects during the
winter months..
(which happens
to be 5 months in Rochester, November - March, so its a good chunk
of the year!)
But once spring
arrives, all modeling comes to a grinding halt, and nothing gets done until
the following November, when winter arrives again..
why?
Because during
the winter, its pitch-dark at 5pm, there is no yard work to be done,
there is 3 feet
of snow and ice on the ground and its below freezing out,
no evening walks,
no bikerides..there is really nothing to do except read books and build
models.
(which are very
fine winter activities)
But once spring
arrives, the yard and garden work begins!
(my wife and
I bought our first house 2 years ago..we are going crazy with the gardening!)
Even right now
in April, its light out until 8pm, soon it will be light out until 9pm.
There is gardening,
bike rides, walks along the canal..(after working 40 hours a week Mon-Fri
of course)
in short, there
simply isnt time for any model railroading during the 7-months of
non-winter..
which is all perfectly
fine with me..
But it does mean
that if a particular "winter project" doesnt get finished by March, it
gets put
"on hold" until
the following October or November!
Which is what
has happened with my Forney project..
so stay tuned!
work will re-commence
in the Fall..
thanks,
Scot
 To
Page 5, Work starts up again with the arrival of Autumn. To
Page 5, Work starts up again with the arrival of Autumn.
 Back
to Page 1 of SR&RL No.9 Back
to Page 1 of SR&RL No.9
Back
to my main page.
|